 |
 |
 |
Multi_R_Designer
Tutorial |
 |
 |
 |
aa
Creation of a user database
from a file:
The creation of a user database is useful on two fronts. The user can
examine its own data combined with the Multi_R_Designer databank and/or
do simulations using the same frame. This way, the user can add his own
data to the list of the Multi_R_Designer databank and make appropriate
comparisons. The user's (experimental) data must be originally stored in
a .csv file, in which every column are identified by a name (or
a number) in the first row (see ex: MultiRDesigner/sample/sample.csv).
It facilitates the assignment of models' inputs.
Use the following steps to create a user database.
STEP 1:
-
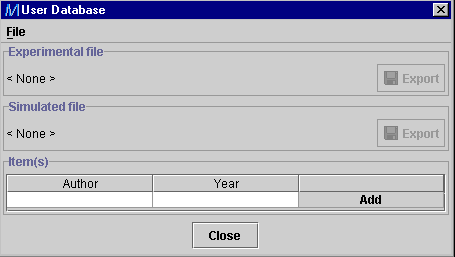
Select Database/User database from the bar menu.
A
User
database dialog window appears.
-
Click on Add.
STEP 2:
-
In an Open box, find the original data file you want to save as
the user database (ex: sample.csv), select it and click on
Open.
STEP 3:
-
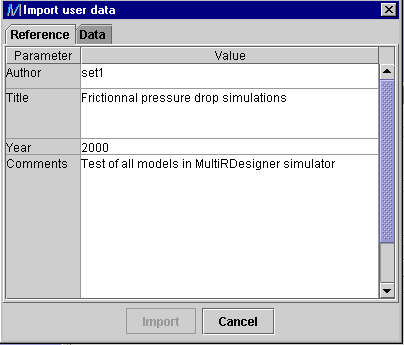
An Import user data dialog window is then opened.
-
Assign a Reference to sample.csv: author, title, year and
comments (if desired).
STEP 4:
-
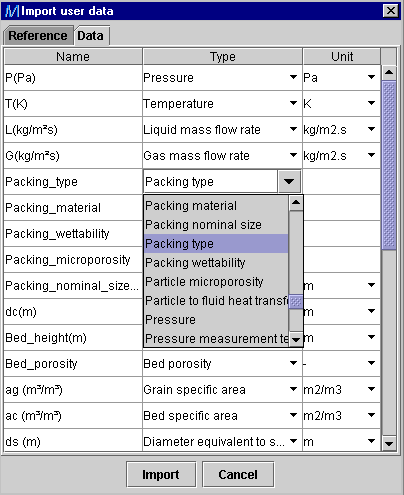
Select the Data tab and identify the columns from sample.csv.
-
For each column (identified in Name), a Type and a
Unit
(if necessary) must be assigned. This action is automatic for columns which
have the same name as those in the Type list. Otherwise, the identification
must be done by scrolling the list until the desired type is found.
-
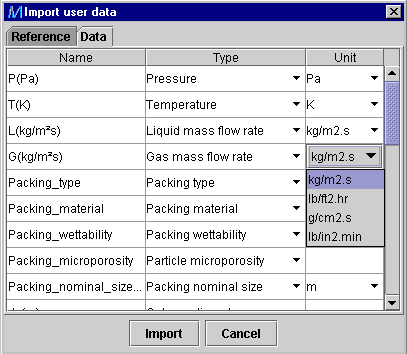
A choice of unit corresponding to the property (if data in file are not
in SI system) is also available by scrolling the list in the Unit
box to select the desired unit. This option is also available in Tools
in the bar menu if the user works either with the English or CGS systems.
STEP 5:
-
Once the identification done, click on Import to save the user
database.
-
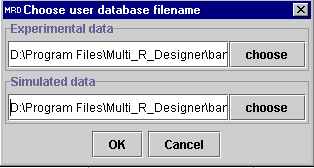
In the Choose user database filename dialog window, press the upper
choose
button (section Experimental data) and give a name and location
for the user database (ex: D: Program Files\Multi_R_Designer\\bank1).
You can also give a name and location for the associated simulation file
where the simulated data will be stored (press the lower
choose
button).
-
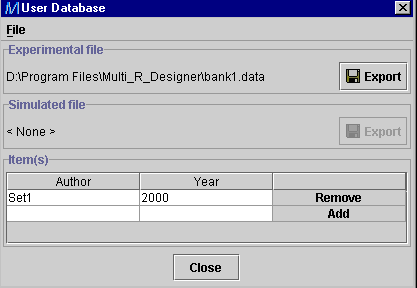
Press OK. The created file appears in the User Database dialog
window.
STEP 6:
-
Finally, press on Close, then you will be asked if you want to create
a simulated database (bank1.sim) associated with the user
database (bank1.data) :
a) If your answer is Yes, an internal procedure will
simulate automatically all parameters (hydrodynamics, mass and heat transfer)
in the simulator using all models, only when their inputs are available
in the user database. In the Automatic
simulation setup dialog window, the user can choose the exact parameters
to be simulated. Then he can choose the name and location of the simulated
file (ex: D\...\bank1.sim).
b) If your answer is No, this procedure is cancelled but
can be called up later by selecting Simulation/Automatic simulation
database from the main menu.
Open a user database:
To work with a new user database or with one different from the
current database, select
Database/User database from the
main menu. You are presented with a User database dialog window.
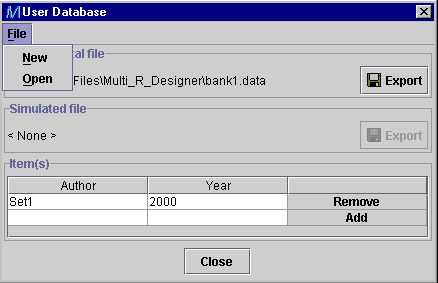
Select File/New or File/Open, and choose the name and location
of the user database and its associated simulated file. Subsequent
queries and simulations will be carried over using the opened user
database.
Add experimental data in a user database:
You can add new data sets in a user database by selecting
Database/User
database from the main menu. In the User database dialog window,
open the desired user database by selecting File/Open. Choose
the name and location of the user database in which the sets will
be added as well as the file where the simulation results will be stored.
This procedure opens the user database where new data can be added,
and on which a query and/or simulations can be also carried out. Once the
user
database and the associated simulation file are chosen, click on Add
and repeat the procedure from STEP 3.
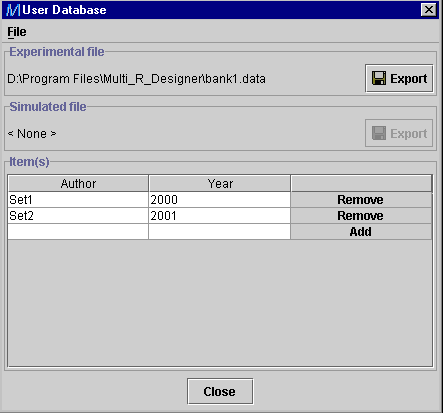
In this example, new data sets (Set2) corresponding to experimental
total liquid holdup are added to the bank1.data file. The previous
user
database
containing only Set1 is renamed bank1.data.old for backup.
The same action is done with the previous simulation file (bank1.sim.old)
whether a new automatic simulation is performed with the new user database
or not.
Delete a data set from a user database:
If you want to remove a data set (experimental values) from a user
database, example Set12, press Remove. A new user
database is automatically created when you click on Close. It will
asked the user if he wants to recreate the associated simulation file.
The previous files will renamed with the .old extension.
STEP 7:
-
The user database bank1.data can now be saved under .csv
format. Just click on Export.
STEP 8:
-
The user database bank1.data is now integrated in the Multi_R_Designer
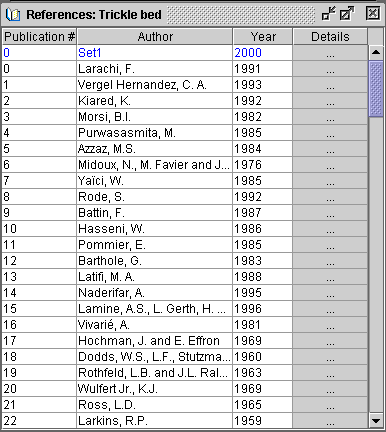
databank As it is shown below on the left figure, the set of data (Set1)
is listed in the Reference list (click on
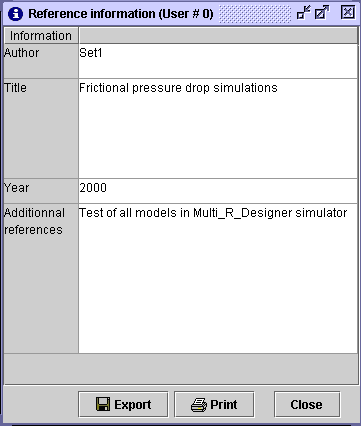
 ). When you select .... Details, information associated to this
set (introduced in STEP 3) are given in Reference information
dialog window (right figure below).
-
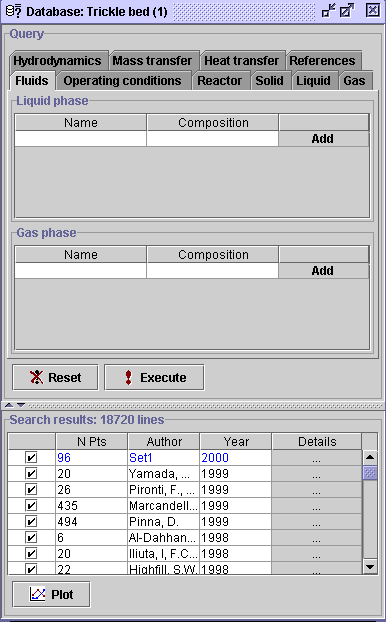
Data in user database can be compared with the data from the Multi_R_Designer
databank using Database/Start new query
(or
 ) in the main menu. As it is shown below on the figure, Set1 is
listed in the Search results table. To do comparison, refer to the
procedure depicted in Case problem VIII.
STEP 9:
-
If many user databases are created, the studies (queries and
simulations) can be done using only one database. So before beginning a
project, go to
Database/User database in the main menu, select
File/Open
in the User database dialog window and find the desired user
database (see
open user database).
 |
 |
 |
Multi_R_Designer
Tutorial |
 |
 |
 |
![]()
![]()
